White Night is Melbourne’s annual one-night festival of lights where installation art and projections take over the city. Running from 7pm to 7am, this year’s festival takes place on 17 February, with satellite events in Bendigo, Ballarat and Geelong. It’s a perfect opportunity to practice your photography and get some amazing shots of the city from a unique perspective. Last year I photographed White Night and wanted to share some tips with you.
What to bring
- Tripod is a must for long exposures
- Fast lenses such as f/2.8, f/1.8 etc
- Snacks and coffee, because who wants to get up at 3am without them?

Settings for photographing White Night
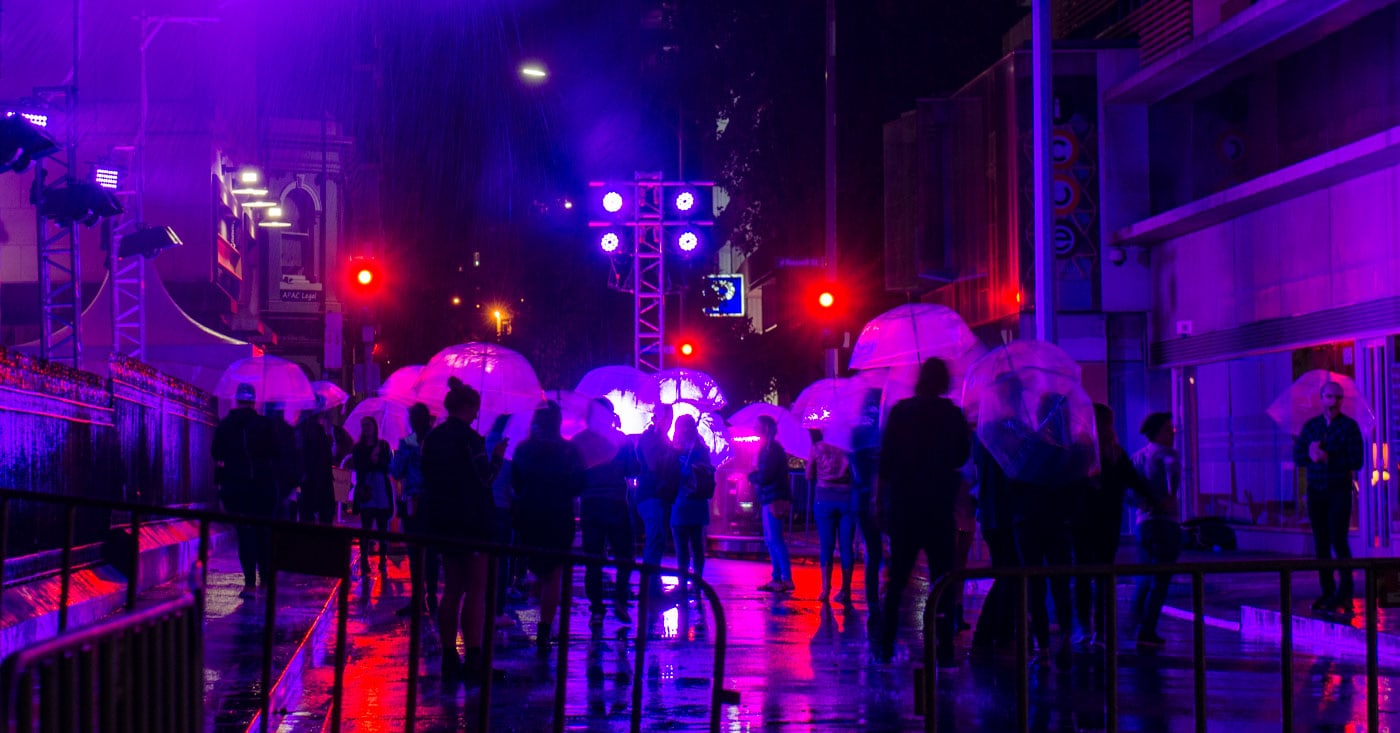
Set up your camera on a tripod – you’re going to need it for these long exposures. Although it might seem like you want to expose your photo as long as possible, you don’t want too long exposures as the light is often changing. Set up your camera in shutter priority mode and try a 5-10 second exposure at first. If the subject is looking blurry, check your focus and go for a shorter exposure. This is particularly noticeable on some of the inflatable exhibitions which will move during a long exposure, so you’re better off doing a 1/10. Sometimes the movement can give a nice effect, like this floating jellyfish.

My top tips
Go early in the morning
White Night is known for being crowded. Think a million people descending on the main street of Melbourne. The peak times of 7pm until midnight are very crowded, which means you won’t be able to set up your tripod in the main areas of town. There are a couple of options – go to less crowded spaces at this time or go early. Really early.
The good thing about going after 3am in the morning is that most of the crowds have dissipated and you can get street parking close to the event (although check the website for road closures). You’ll have enough space to stick up a tripod, although be aware of people who have been out partying all night.
Make a plan
You are not going to see all of White Night in a night. Just accept that and move onto making a plan of what you want to see. Pick some events in a similar location – last year I worked my way down Swanson Street across to the Arts Centre and finished on the banks of the Yarra River watching the sunrise.
Don’t be so rigidly sticking to your plan that you can’t stop and enjoy yourself! Part of the fun of White Night is enjoying the artworks and participating in the program.
Keep a copy of the program
This is for later when you’re editing photos. Don’t rely on websites to keep their information up after the event. Keep a paper copy of the program so you can label all your photos correctly with artworks and artists. This was a fail for me so next time I’ll follow my own advice.
Photograph people in the environment
Long exposures of White Night are the obvious first choice, but also make sure you include people in their environment. It’s all well and good to want a street void of people, but sometimes your photography can be improved by adding people and watching their experiences. This is where your fast lenses come in, if you’re doing any hand-held work.

Check your colour histogram
With varying light, plus lights of different colours, make sure you check your colour histogram to see that they are exposed correctly. Sometimes different camera sensors process extreme colours differently and you might not be able to see it on the LCD. You could take a good photo only to find that the reds are clipping.
Despite the early wake up call, it’s so worth getting up to photograph White Night. So set your alarm clocks folks and get out there this weekend!